Artwork Guidelines
Print-Ready File Setup for Packaging. Follow these professional instructions to avoid delays, printing errors, and ensure crisp manufacturing quality.
1. Introduction
Preparing print-ready artwork is critical in packaging production. Even a minor mistake in file setup can cause color shifts, structural cutting issues, or blurry prints. This guide helps you set up files correctly for seamless B2B production runs.
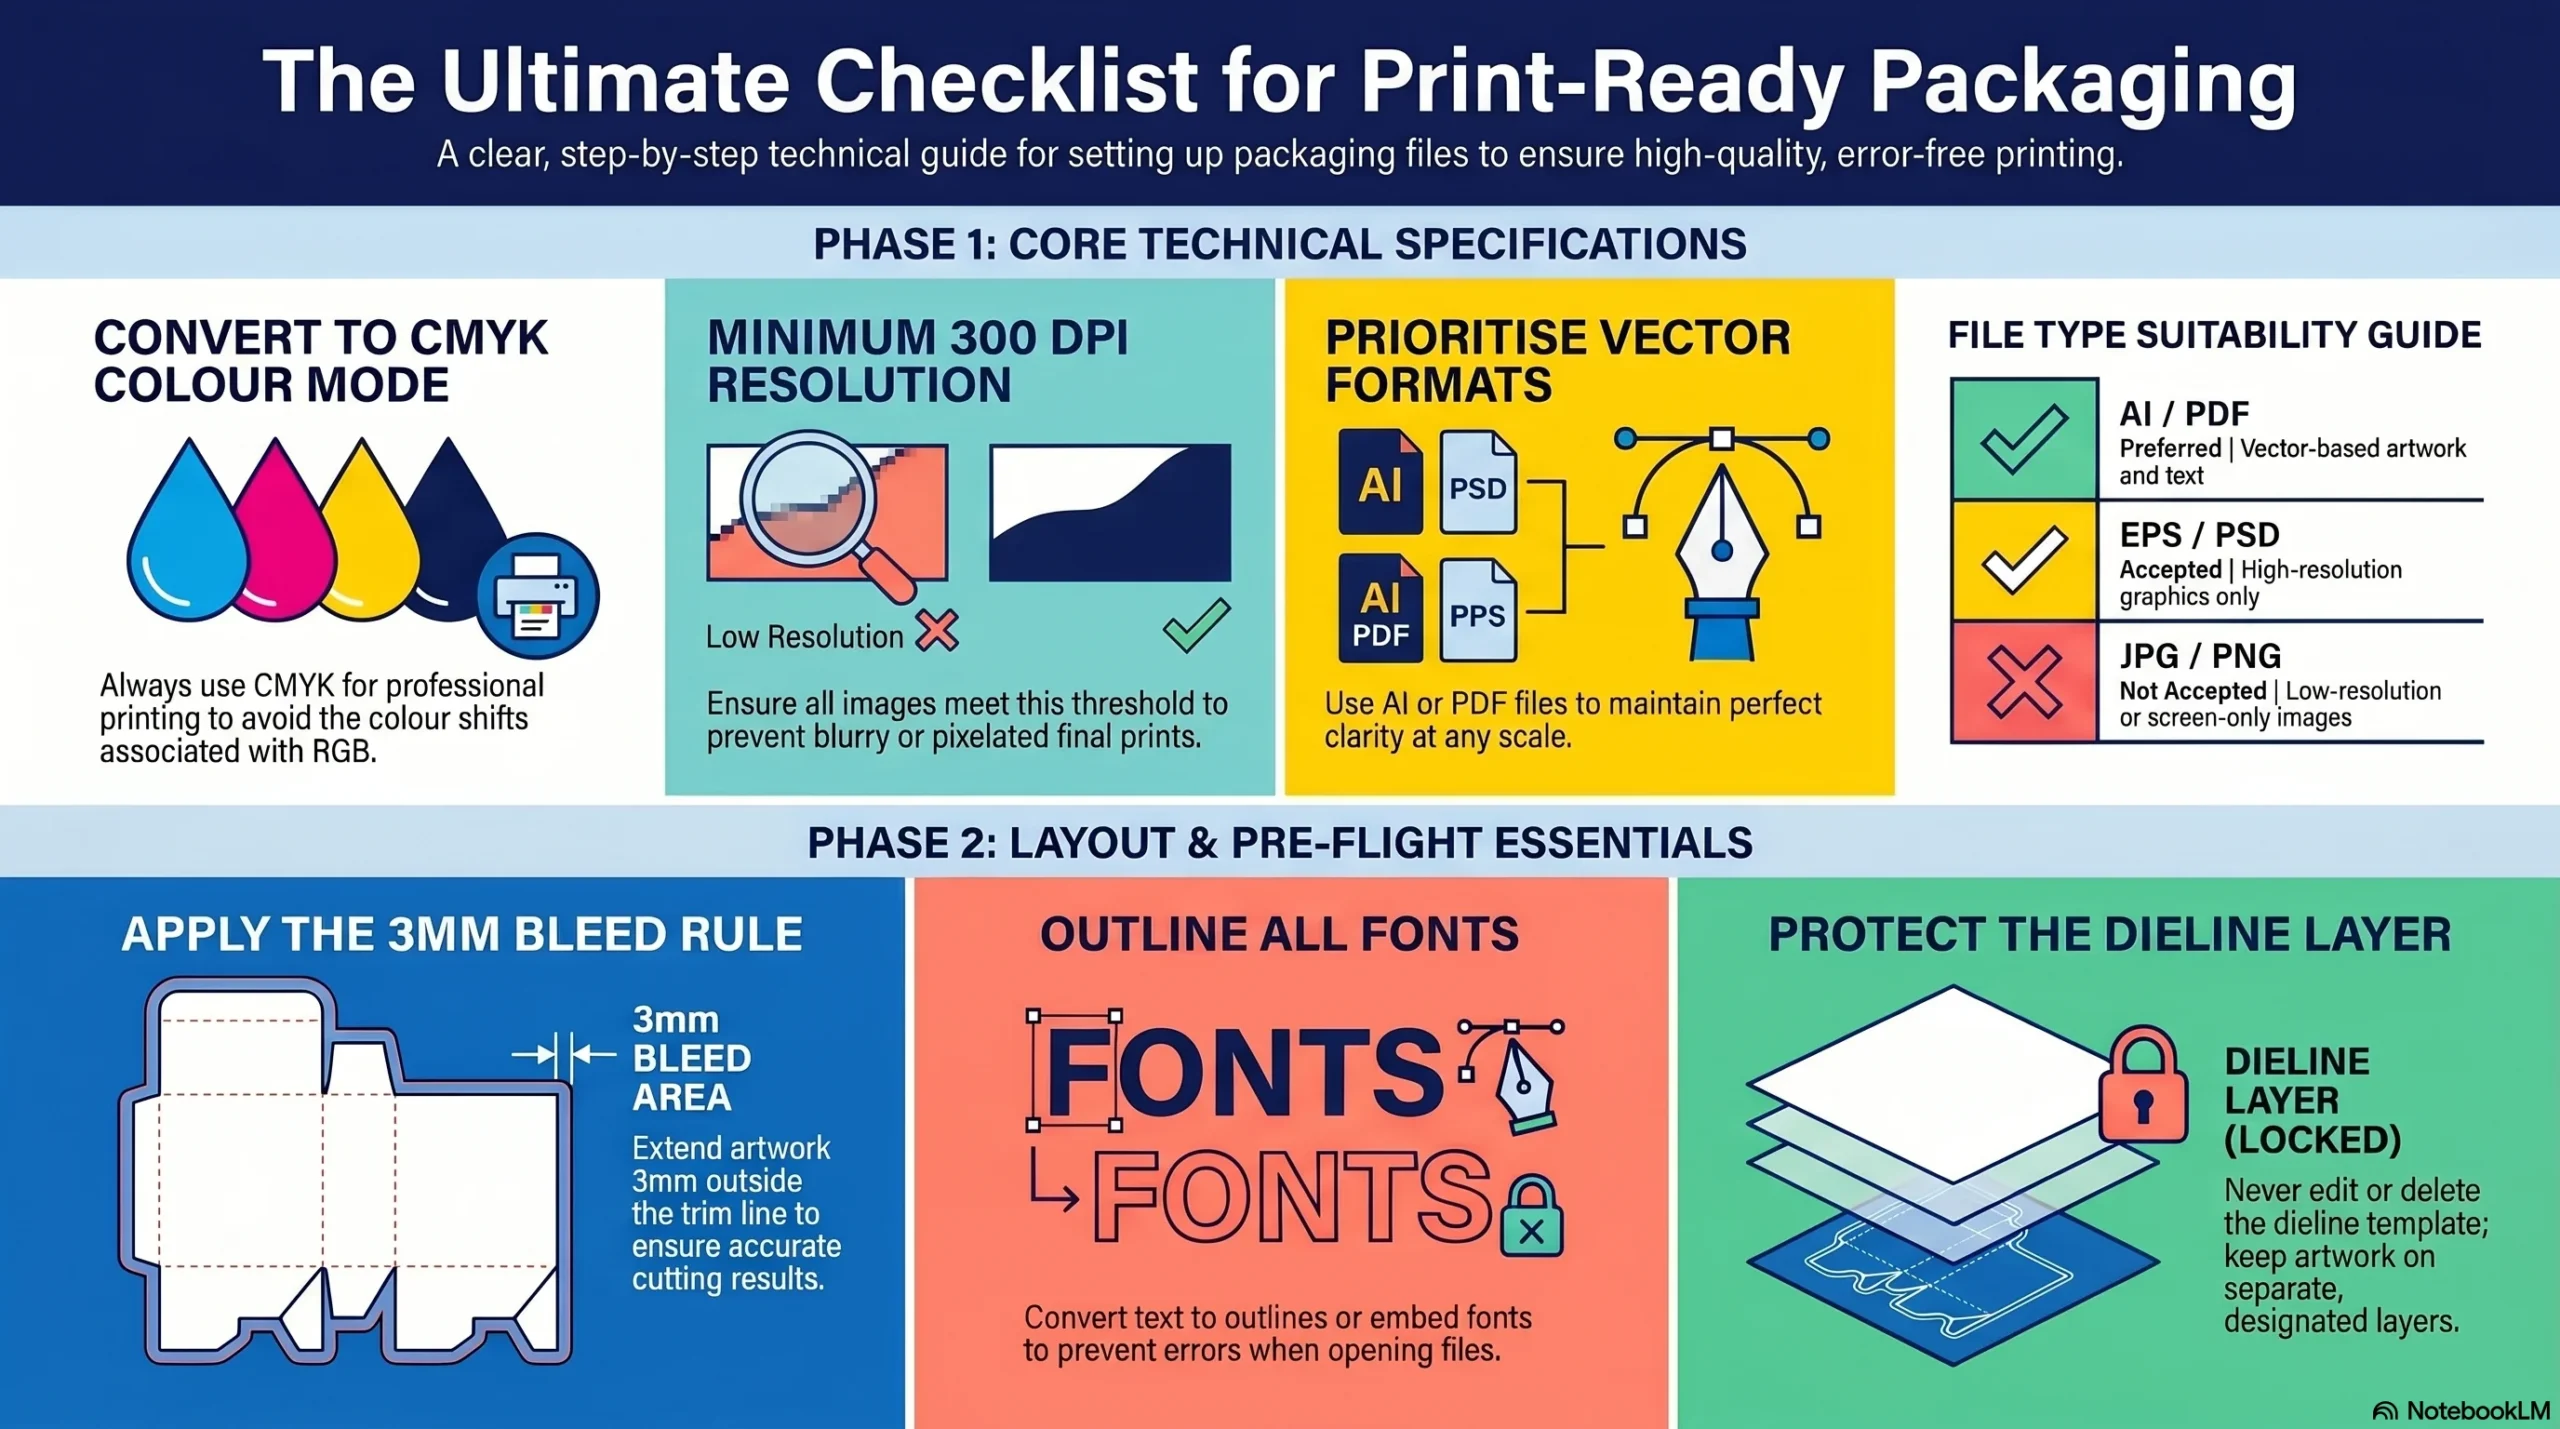
✅ 2. Print-Ready File Checklist
Ensure your files meet these baseline criteria before submitting your layout:
File Formats: AI, PDF, EPS, PSD
Color Mode: CMYK Only
Resolution: 300 DPI Minimum
Bleed: 3mm (0.125″) All Sides
Safe Zone Maintained for Text
Fonts Outlined / Embedded
3. File Formats & Setup Rules
We highly recommend vector-based art assets (AI, PDF) because they maintain infinite edge crispness at any scalable structural print layer.
Accepted: EPS, PSD (High Res)
❌ Blocked: Screenshots or PNGs
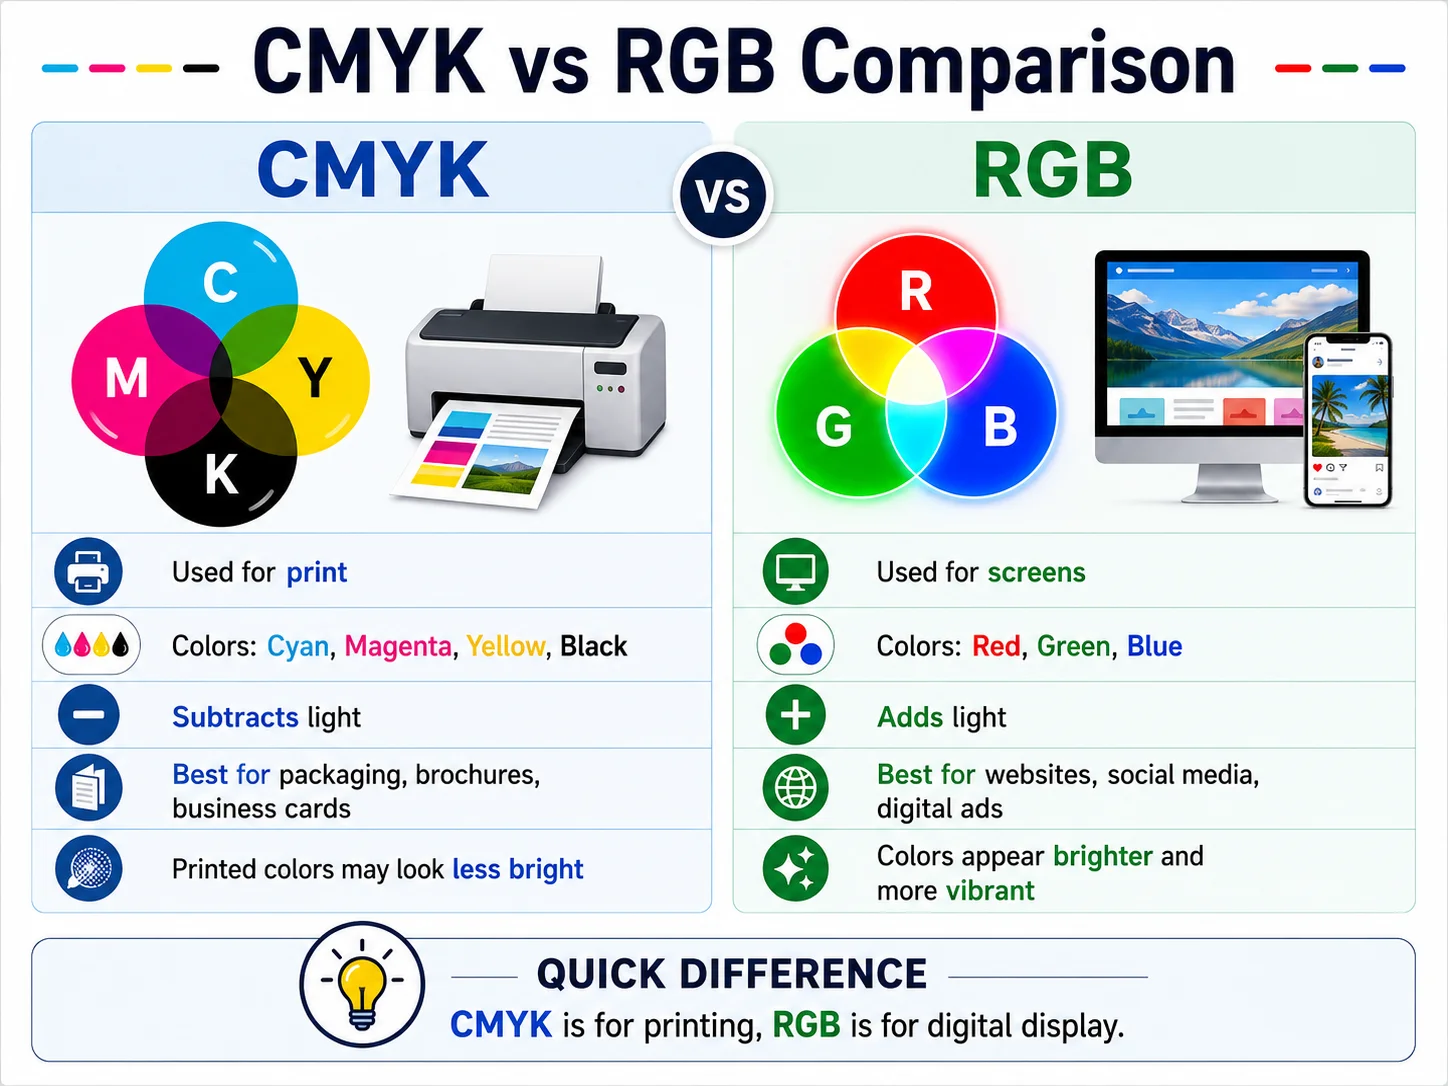
4 & 5. Color Tones & Resolution Standards
| Specification Element | Production Standard Requirement |
|---|---|
| Color Space Configuration | CMYK Only. Always convert native RGB files before final design packaging layout exports to avoid color shift drops. |
| Resolution Quality Metric | 300 DPI Minimum at full actual print scale dimensions. Never upscale low-res web asset vectors. |
6. Bleed, Trim Line & Safe Zone Definitions
Extend your background design artwork 3mm past the main layout bounds to eliminate raw white paper edges during structural press machine shifts.
The structural product finish target mark line where the physical custom boxes die cutters chop and slice your sheets into standalone pieces.
Keep branding logo assets, critical barcodes, text layers, and layout copies at least 3mm safe inside the main structural perimeter.

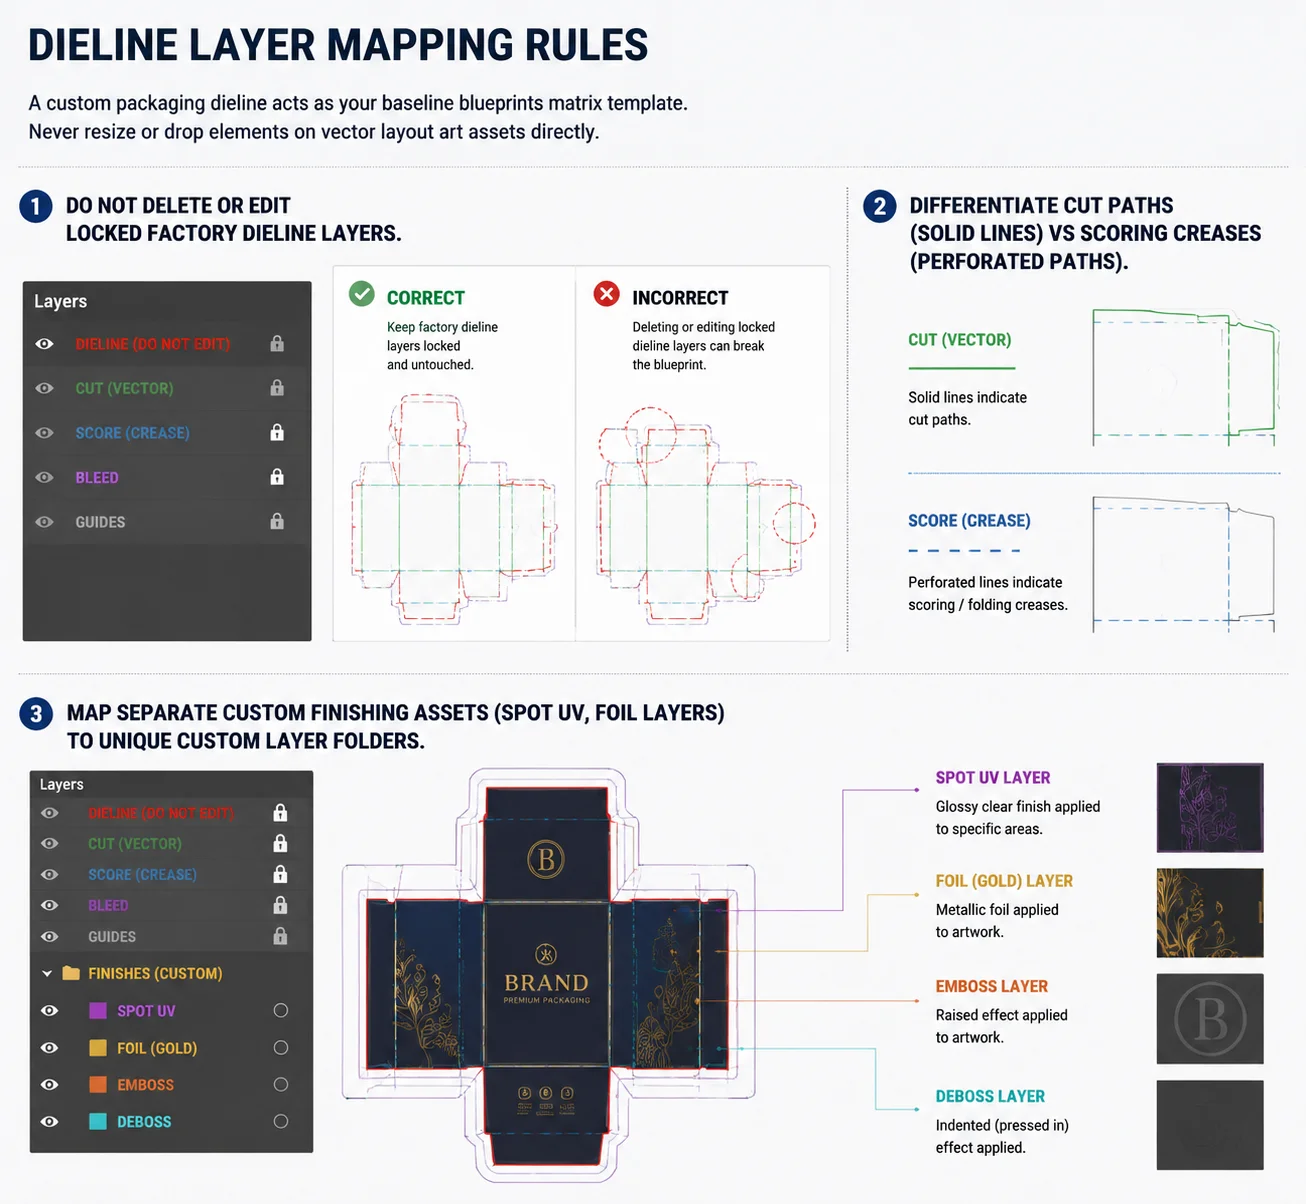
7. Dieline Layer Mapping Rules
A custom packaging dieline acts as your baseline blueprints matrix template. Never resize or drop elements on vector layout art assets directly.
- Do not delete or edit locked factory dieline layers.
- Differentiate cut paths (solid lines) vs scoring creases (perforated paths).
- Map separate custom finishing assets (Spot UV, Foil layers) to unique custom layer folders.
10. Pro File Submission Tips
Use descriptive naming codes:
ProductName_Size_V1.pdfSubmit one individual distinct vector asset per structural box design SKU item.
Always export final versions using high-tier PDF/X-1a:2001 or PDF/X-4 print presets.
11. Need File Setup Assistance?
If your vector files are not perfectly print-ready, relax! Our in-house custom layout designers can perform manual artwork vector reviews and fix structural margins for you.